How to Fix No Sound, Echo, Audio Delay, Noise, and Audio Problems in TikTok LIVE Studio
2026-03-07
How to Fix No Sound, Echo, Audio Delay, Noise, and Audio Problems in TikTok LIVE Studio
Audio problems can ruin a stream faster than imperfect video. If viewers cannot hear you clearly, if the microphone picks up too much noise, if they hear their own words back as echo, if your lips and voice stop matching, or if desktop audio disappears entirely, the stream becomes hard to follow no matter how good the layout looks.
The good news is that most TikTok LIVE Studio audio issues come from a small number of causes: wrong device routing, muted channels, duplicated audio paths, delayed processing chains, overly aggressive effects, or a noisy source.
The fastest way to solve them is to decide what kind of failure you are hearing first, then test one audio path at a time.
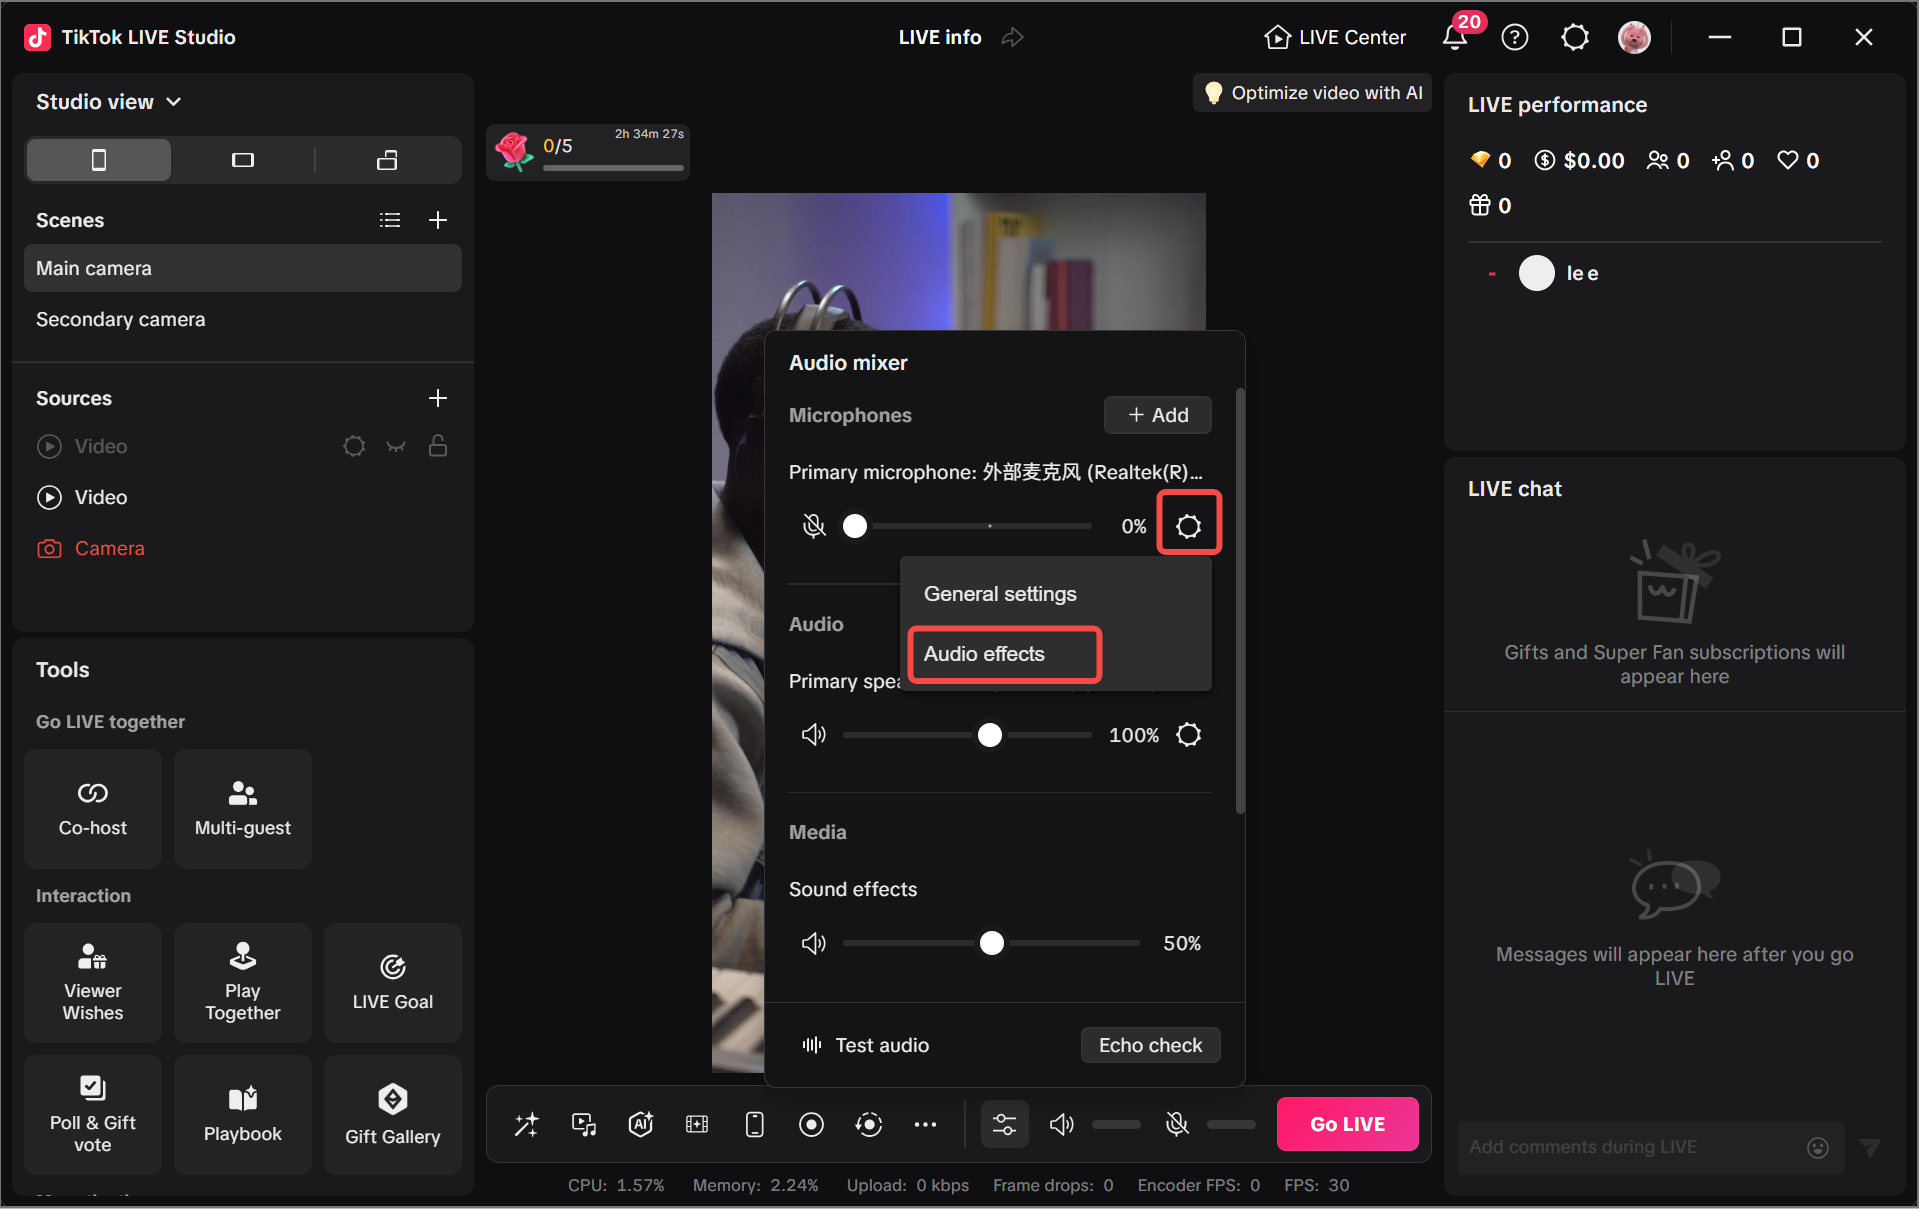
Figure Out Which Audio Problem You Actually Have
Start by describing the issue precisely:
- is the mic noisy?
- is the mic completely muted?
- is desktop audio missing?
- is there echo or double audio?
- is the audio late compared with the video?
- does the voice sound strange after effects are applied?
These are not the same issue, and changing several settings at once usually makes troubleshooting slower. Once you know which symptom you are chasing, the rest becomes much easier.
A common mistake is calling every audio problem “bad sound.” That label is too broad. A muted mic is a routing problem. Hiss may be a source or gain problem. Echo is often a monitoring, speaker bleed, or duplicate capture problem. Lip-sync drift is usually a delay or processing-chain problem. Strange vocal tone may be an effects problem. The faster you define the symptom, the faster you find the right fix.
A useful first question is: who cannot hear the sound?
- if you cannot hear anything locally, check routing and monitoring first
- if you hear it locally but viewers do not, check stream-facing input or output selection
- if people hear you but complain about quality, check levels and processing next
Start with the Audio Mixer and Device Routing
The audio mixer is the best first checkpoint because it shows the active devices and gives you access to settings quickly.
Look for:
- the correct primary microphone
- the correct output or speaker device
- whether the expected channels are muted
- whether the wrong device was selected after reconnecting hardware
If a microphone was unplugged and reconnected, or if a headset changed the default system route, LIVE Studio may no longer be listening to the device you thought it was using.
Routing first, effects second. That order saves time.
The screenshot matters because it shows that microphone and system audio live inside the same control area. That means you can quickly test whether the problem is input, output, or both before you start changing sound processing.

The second mixer image makes the troubleshooting order even clearer. Before you touch EQ or effects, confirm that the right channels are active, the levels are not accidentally too low, and the mute state is what you think it is. The built-in sound check flow is useful here because it gives you a quick confirmation point before you go further.
Use Audio Effects Carefully
Audio effects can improve clarity, but they can also create a processed or unnatural result when overused.
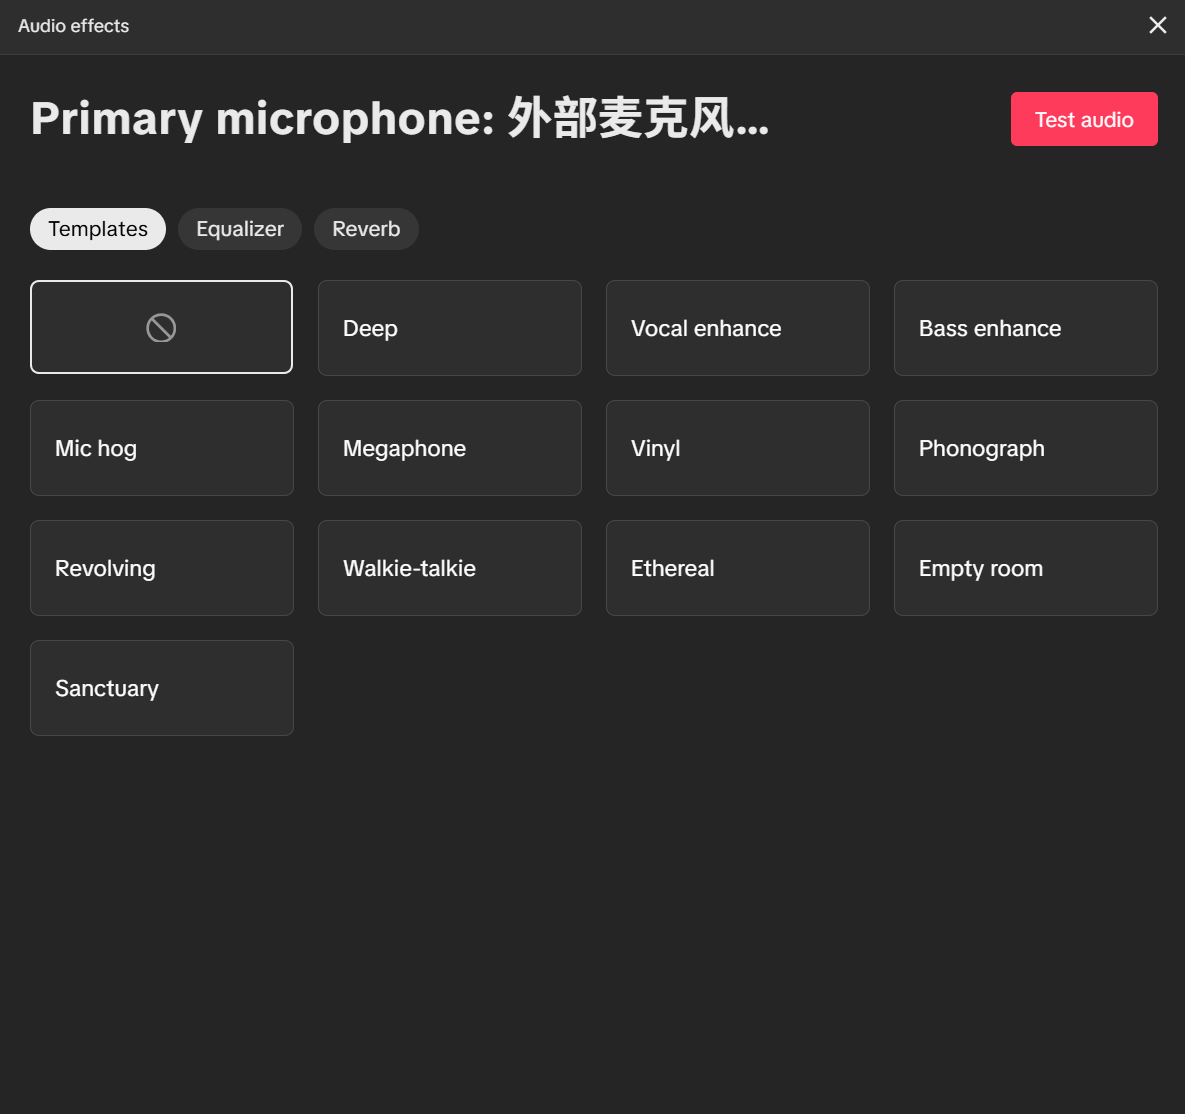
Presets can be a good starting point, especially when you need fast improvement, but they should still be tested with your own voice and microphone. A preset that sounds fine on one setup can sound harsh, hollow, or exaggerated on another.
The equalizer view is useful when you want finer control.
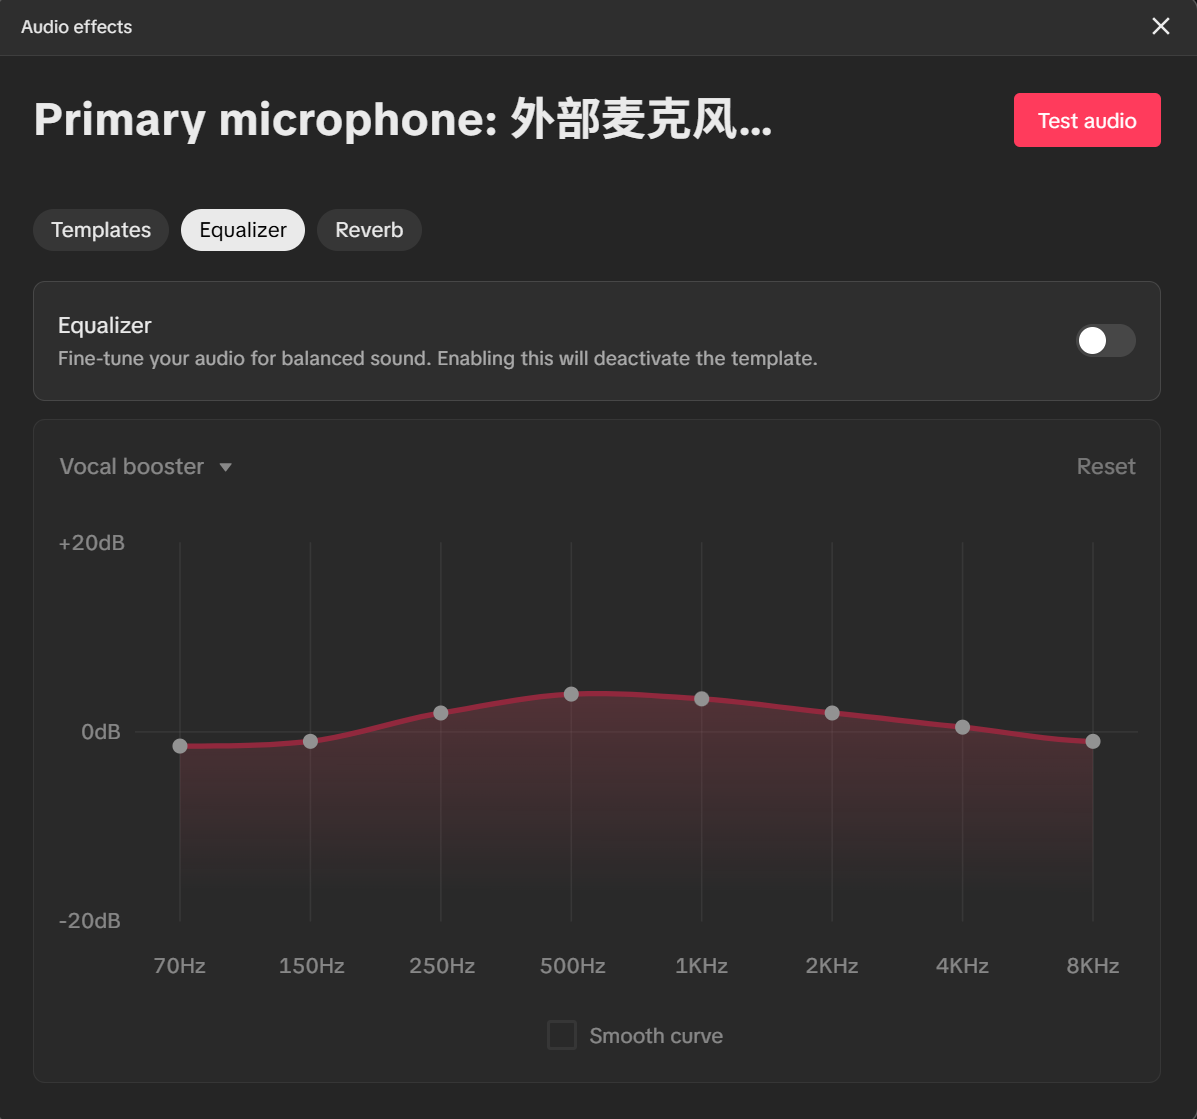
The goal is not dramatic audio shaping. It is a clear, stable, natural voice that viewers can listen to for a long time.
A useful judgment rule is to change only one processing layer at a time. Test a preset by itself before adding EQ changes. If you layer too many adjustments at once, it becomes harder to tell which one actually improved or damaged the sound.
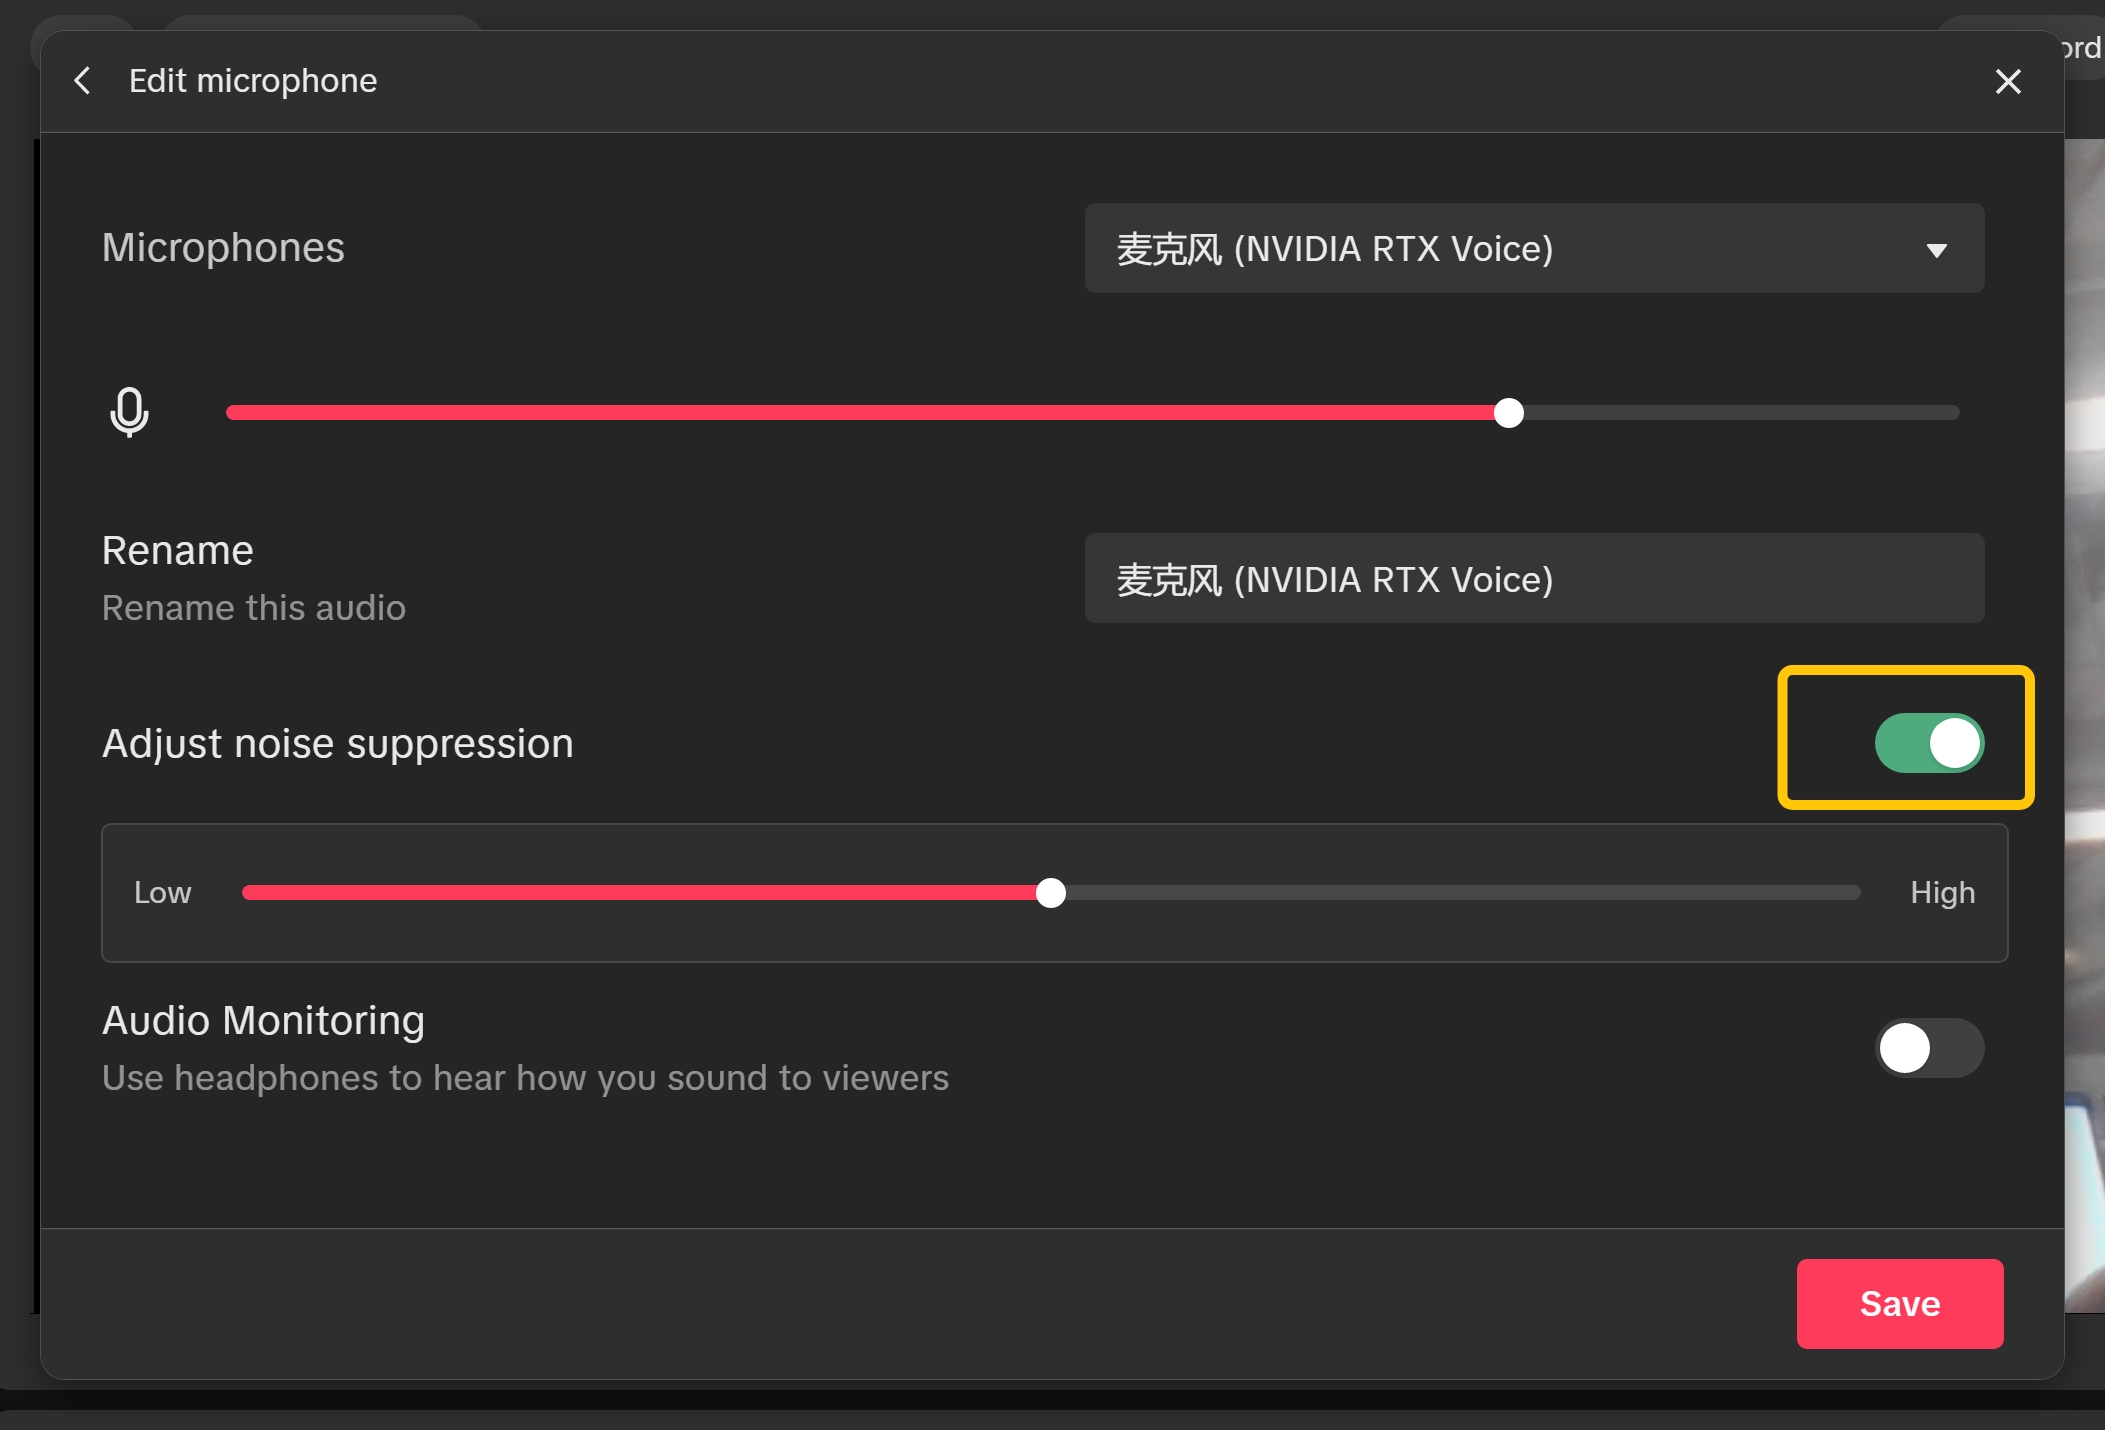
This microphone settings view is important because it shows that noise suppression and audio monitoring belong to the troubleshooting chain too. If the sound is noisy, you may need cleaner source placement first. If the sound is hard to judge, monitoring can help you hear what viewers are likely hearing before you stack more effects on top.
Fix Muted Mic or Missing Computer Sound
When audio disappears completely, the cause is often simple:
- the mic channel is muted
- the wrong input device is selected
- the wrong output or monitoring route is selected
- the sound you expected is coming from a different source than your stream mix
A practical method is to test one path at a time. First confirm the microphone path. Then confirm desktop or media sound. Then confirm that both can exist together without one replacing the other.
If you skip this order and jump straight into effects or EQ, you may spend time tuning a signal that is not even routed correctly.
A common mistake is assuming that because you hear something locally, viewers also hear it. Monitoring and stream output are not always the same thing. Confirm both.
One practical order works well:
- Confirm the mic path.
- Confirm desktop or media audio.
- Confirm that neither one is muted or routed to the wrong device.
- Only then decide whether the problem is processing rather than routing.
Fix Echo, Double Audio, and Feedback Loops
Echo is one of the most common creator-side audio problems because it can come from several different places that sound similar at first.
Usually it is one of these:
- speakers are playing your stream audio back into the microphone
- monitoring is active in more than one place, so you hear a delayed duplicate
- the same sound is being captured twice, such as voice in the mic and again through desktop audio
- an external capture or call tool is returning audio back into the mix
The first step is to ask who hears the echo.
- if only you hear it, the problem is often local monitoring or headphone routing
- if viewers hear it too, the problem is more likely speaker bleed, duplicate capture, or a return path in the stream mix
- if the echo appears only during calls or guest sessions, check whether another app is also monitoring or sending audio back
Headphones solve a surprising number of echo cases. If you stream through open speakers, the microphone may keep picking up your own output and sending it back to viewers. That creates a repeated, roomy, or delayed voice even when the mic itself is fine.
Another common mistake is capturing the same content from two paths. For example, your mic picks up your voice directly, but desktop audio or an external device also carries a second copy. Viewers then hear a doubled voice instead of a clean single signal.
A practical echo troubleshooting order looks like this:
- Put on headphones and mute room speakers.
- Check whether audio monitoring is enabled in LIVE Studio or on your audio interface.
- Confirm that your voice is not being captured once by the microphone and again by another source.
- If you use calls, capture cards, or virtual audio tools, temporarily disable them one by one.
- Test again after each change instead of changing everything together.
The goal is to remove duplicate paths, not to cover the problem with processing. Noise suppression and EQ do not fix real echo if the signal is being repeated elsewhere in the chain.
Fix Audio Delay and Lip-Sync Problems
Audio delay is different from echo. Echo means the same sound repeats. Delay means the sound arrives once, but it arrives too early or too late compared with the video.
Creators often describe both problems as “audio feels wrong,” so this distinction matters. If viewers hear one clean voice but your mouth movement does not match it, you are dealing with sync rather than repeated sound.
Common causes include:
- camera or capture devices adding video delay while audio stays fast
- heavy processing on the microphone chain
- multiple apps touching the same source before it reaches LIVE Studio
- unstable hardware paths after reconnecting cameras, capture cards, or USB audio devices
The fastest test is to record or monitor a short clip where you clap once on camera. If the clap sound lands clearly before or after the hand contact, the stream is out of sync.
A practical troubleshooting order looks like this:
- Check whether the problem is visible only in preview or also in an actual recording or viewer-facing test.
- Simplify the chain by turning off extra audio processing, virtual routing, or external monitoring tools.
- Reconnect the camera, capture card, and microphone path in a clean order so LIVE Studio re-detects them.
- Avoid changing multiple devices at once, especially webcams, USB microphones, and capture hardware.
- Test again with a short clap or spoken count after each change.
If sync breaks only after long sessions, suspect device instability or a processing chain that becomes unreliable over time. In that case, restarting the affected device path is usually faster than stacking more fixes on top.
The main rule is the same as every other troubleshooting flow in this article: simplify first. The more duplicated tools, effects, and device hops you add, the harder it becomes to keep audio and video aligned.
Reduce Noise and Echo Without Overprocessing
The cleanest audio usually starts before software:
- move the microphone closer to the mouth
- reduce room noise where possible
- lower unnecessary speaker bleed
- keep gain at a sensible level
Software tools can help after that, but they work best as refinement, not rescue. Heavy processing may reduce noise, but it can also make the voice sound thin or artificial.
Try to solve the source first, then apply only as much processing as needed.
For echo specifically, remember that room treatment and speaker choice matter too. A reflective room creates a more hollow voice, while open speakers can create a true repeated echo. Those are related but not identical problems, so do not assume one toggle inside software will solve both.
Common mistakes include:
- raising gain too high and then trying to “fix” the noise later
- using speakers that bleed back into the mic
- leaving monitoring on in multiple places
- capturing the same voice from more than one audio path
- adding unnecessary processing or device hops that create sync drift
- stacking too many vocal effects on a weak raw signal
- treating noise suppression like a replacement for good microphone placement
A Quick Audio Test Checklist Before Going LIVE
A repeatable pre-live checklist prevents many common failures:
- Speak into the microphone and confirm the right input responds.
- Play a known sound and confirm desktop audio is present if needed.
- Check that no critical channel is muted.
- Listen for hiss, echo, doubled voice, distortion, or delayed speech.
- Confirm you are not monitoring audio from more than one place.
- Do a quick clap or count test to confirm lip-sync still feels right.
- Test effects only after clean routing is confirmed.
This small routine takes less time than fixing a broken stream in front of viewers.
If your setup changes often, such as switching microphones, headsets, or rooms, this checklist becomes even more important. Small hardware changes often create the biggest audio surprises.
Summary
Most TikTok LIVE Studio audio problems are easier than they first appear. If you check the mixer, confirm routing, remove duplicate paths, watch for sync drift, test levels before effects, and avoid overprocessing, you can solve noisy, muted, echoing, delayed, or missing sound much faster. Audio becomes manageable once you troubleshoot it in the right order.