How to Manage Chat, Preview, Recording, and Hotkeys in TikTok LIVE Studio
2026-03-07
How to Manage Chat, Preview, Recording, and Hotkeys in TikTok LIVE Studio
Once your scenes and sources are ready, the next challenge is operating the stream smoothly. That is where preview, recording, chat visibility, LIVE Center, and hotkeys become important. They do not change what your stream is about, but they make it much easier to run without missing something obvious.
Many beginner mistakes happen because creators only watch the main canvas and ignore the tools around it. LIVE Studio gives you a better control loop if you use those panels on purpose.
Why These Controls Matter
Streaming is not only about what appears on screen. It is also about how you monitor, react, and recover in real time. A calm operator usually creates a calmer stream.
A good operating layer helps you:
- verify layout before going live
- capture a local copy for edits or clips
- respond to chat without losing focus
- monitor metrics without guessing
- switch actions quickly without mousing through menus
The important point is that these controls work together. Preview tells you how the stream looks from the viewer side. Recording gives you a copy for review. Chat tells you how people are reacting. LIVE Center shows whether momentum is rising or falling. Hotkeys reduce the friction of acting on what you notice.
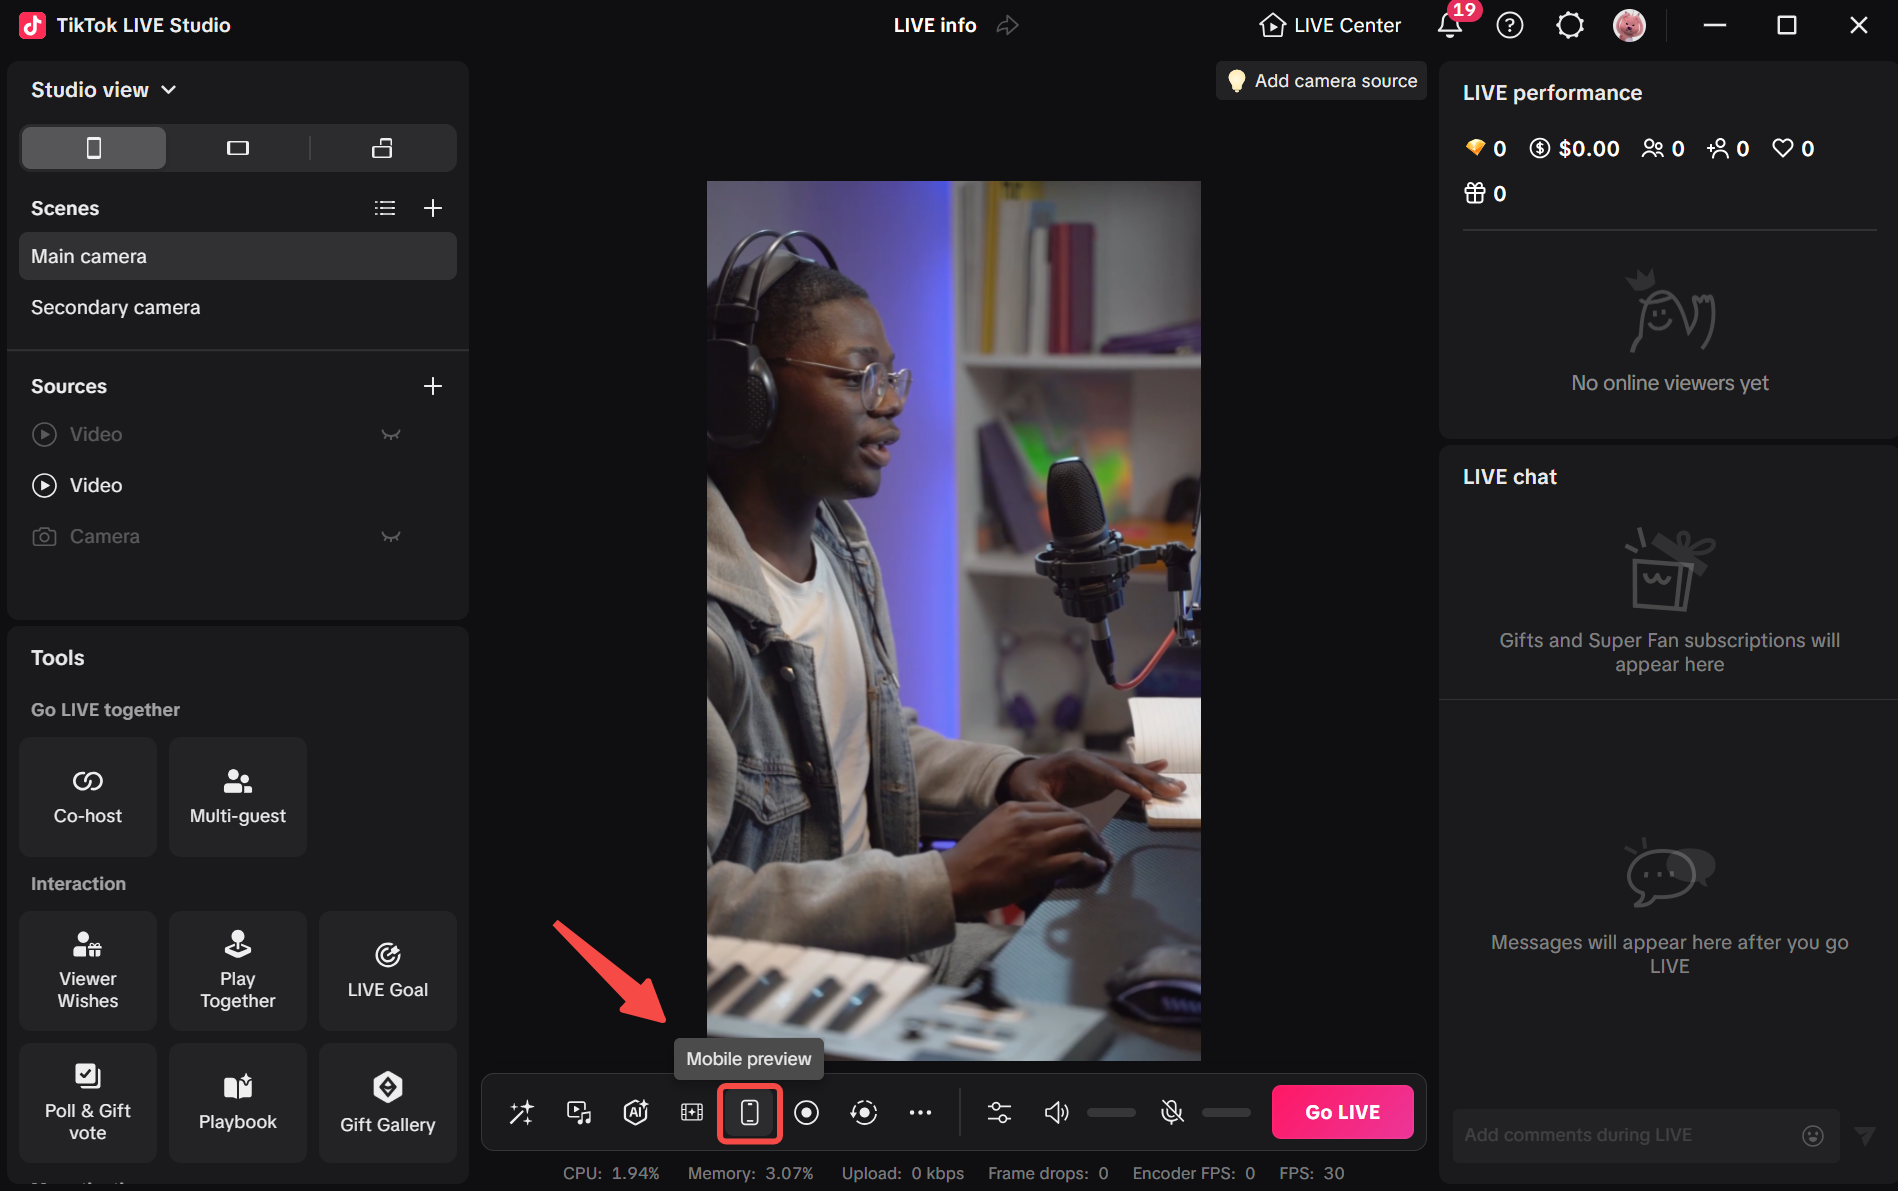
How Mobile Preview Helps Before and During a Stream
Mobile preview is useful because many viewers will experience your LIVE on a phone, not on your desktop monitor.
Before you start, use preview to check:
- whether the framing feels too tight or too far away
- whether on-screen text is readable
- whether overlays cover important content
- whether the scene feels balanced in vertical view
This button matters because the desktop canvas can fool you. A layout that feels fine on a wide monitor can look cramped on a phone. Text may become too small. A corner element may suddenly cover the exact part of the stream you wanted viewers to notice.
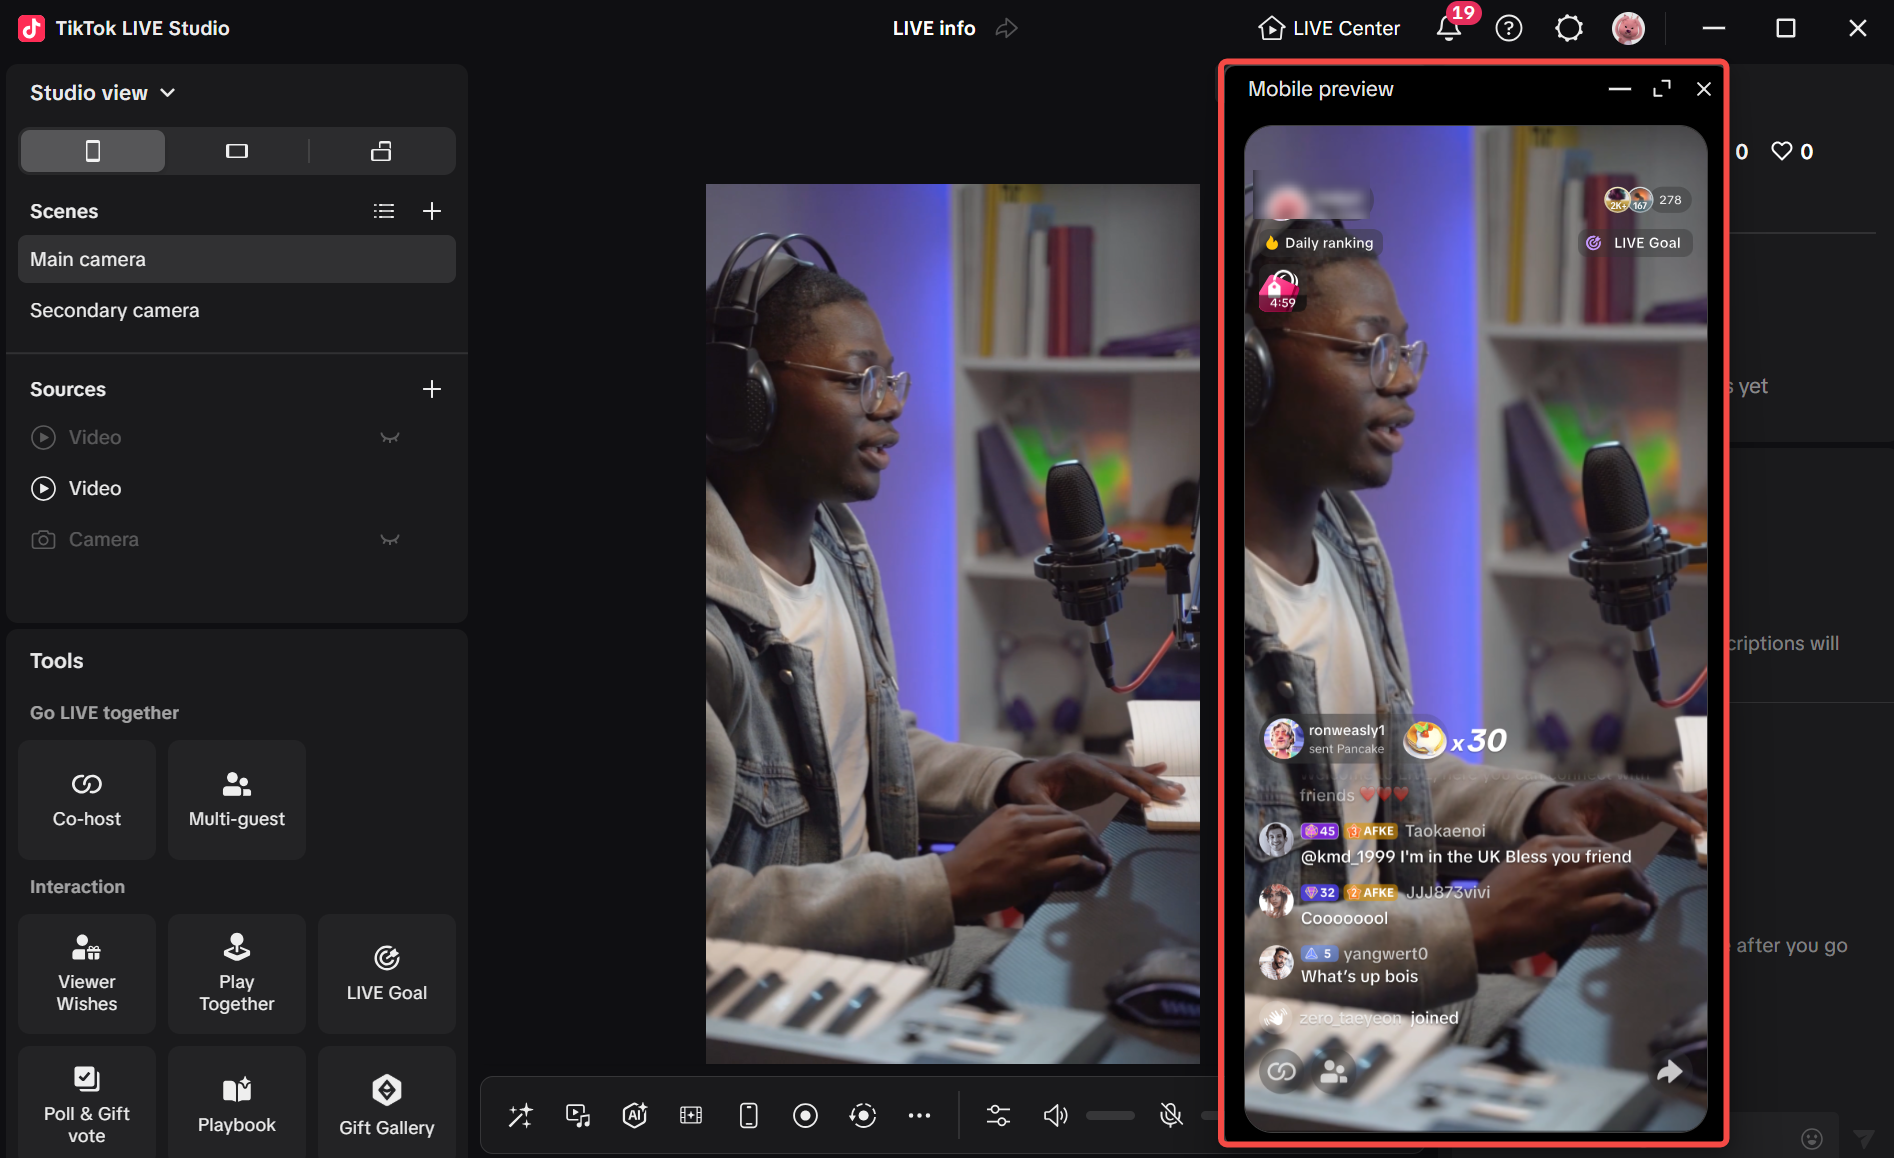
The preview window itself is useful because it shows what the stream looks like as a vertical LIVE, not just where the button lives. That makes it much easier to judge readability, spacing, and whether floating UI elements distract from the main subject.
A practical way to use preview is:
- Check your opening scene before you go live.
- Switch to one or two alternate scenes and make sure the framing still works.
- Re-check preview after adding a new overlay, source, or chat-related widget.
A common mistake is using preview once and assuming every scene is safe. If your stream changes layouts often, preview should be part of your pre-live routine, not a one-time curiosity.
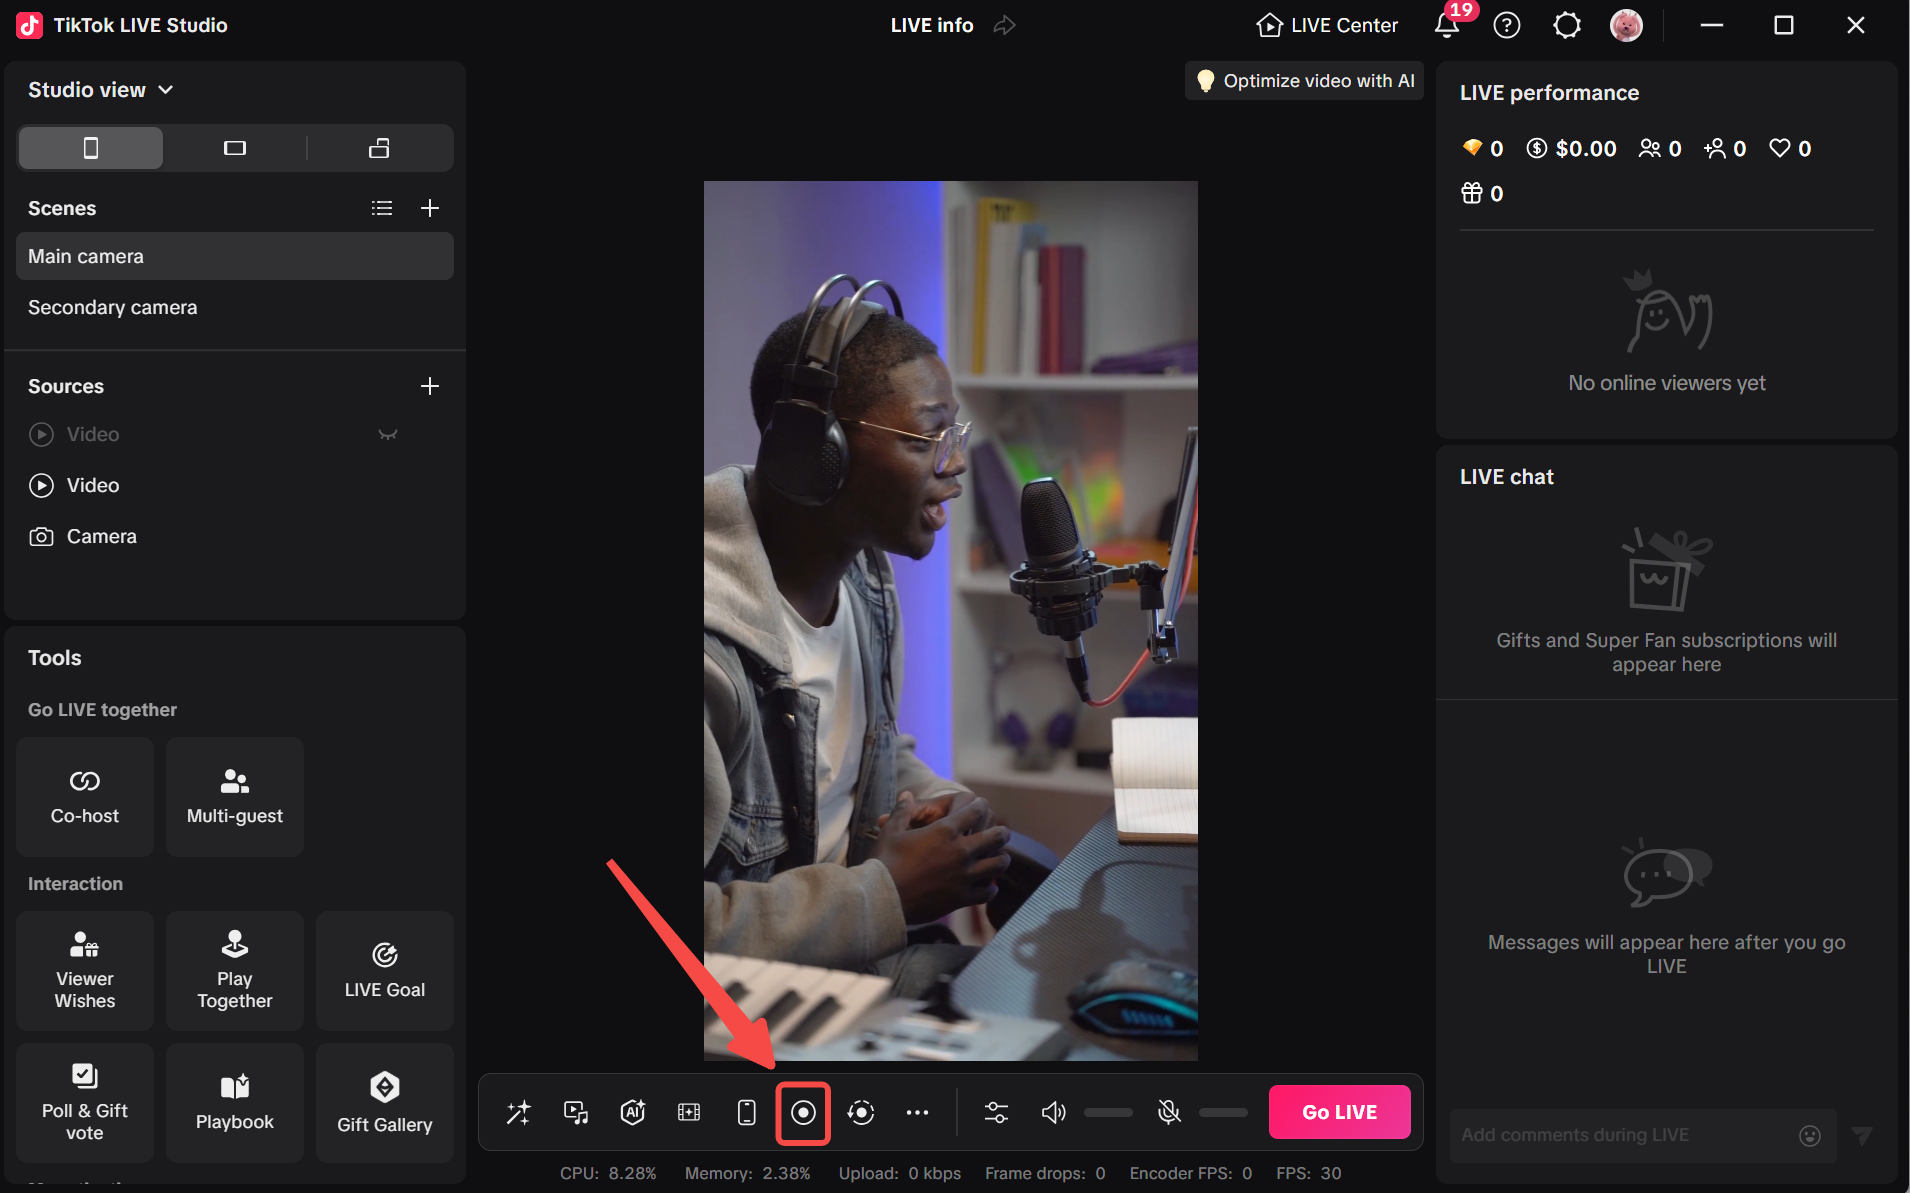
When to Record Your LIVE Locally
Recording is valuable even if your main goal is the live session itself.
A local recording helps when you want to:
- cut highlights for short-form clips
- review pacing, camera changes, and mistakes
- save a cleaner version for later reuse
- inspect exactly what happened during a technical issue
Recording is especially useful when you are still improving your operating workflow. A replay lets you see whether scene changes felt abrupt, whether dead air was longer than expected, or whether your call to action landed the way you thought it did.
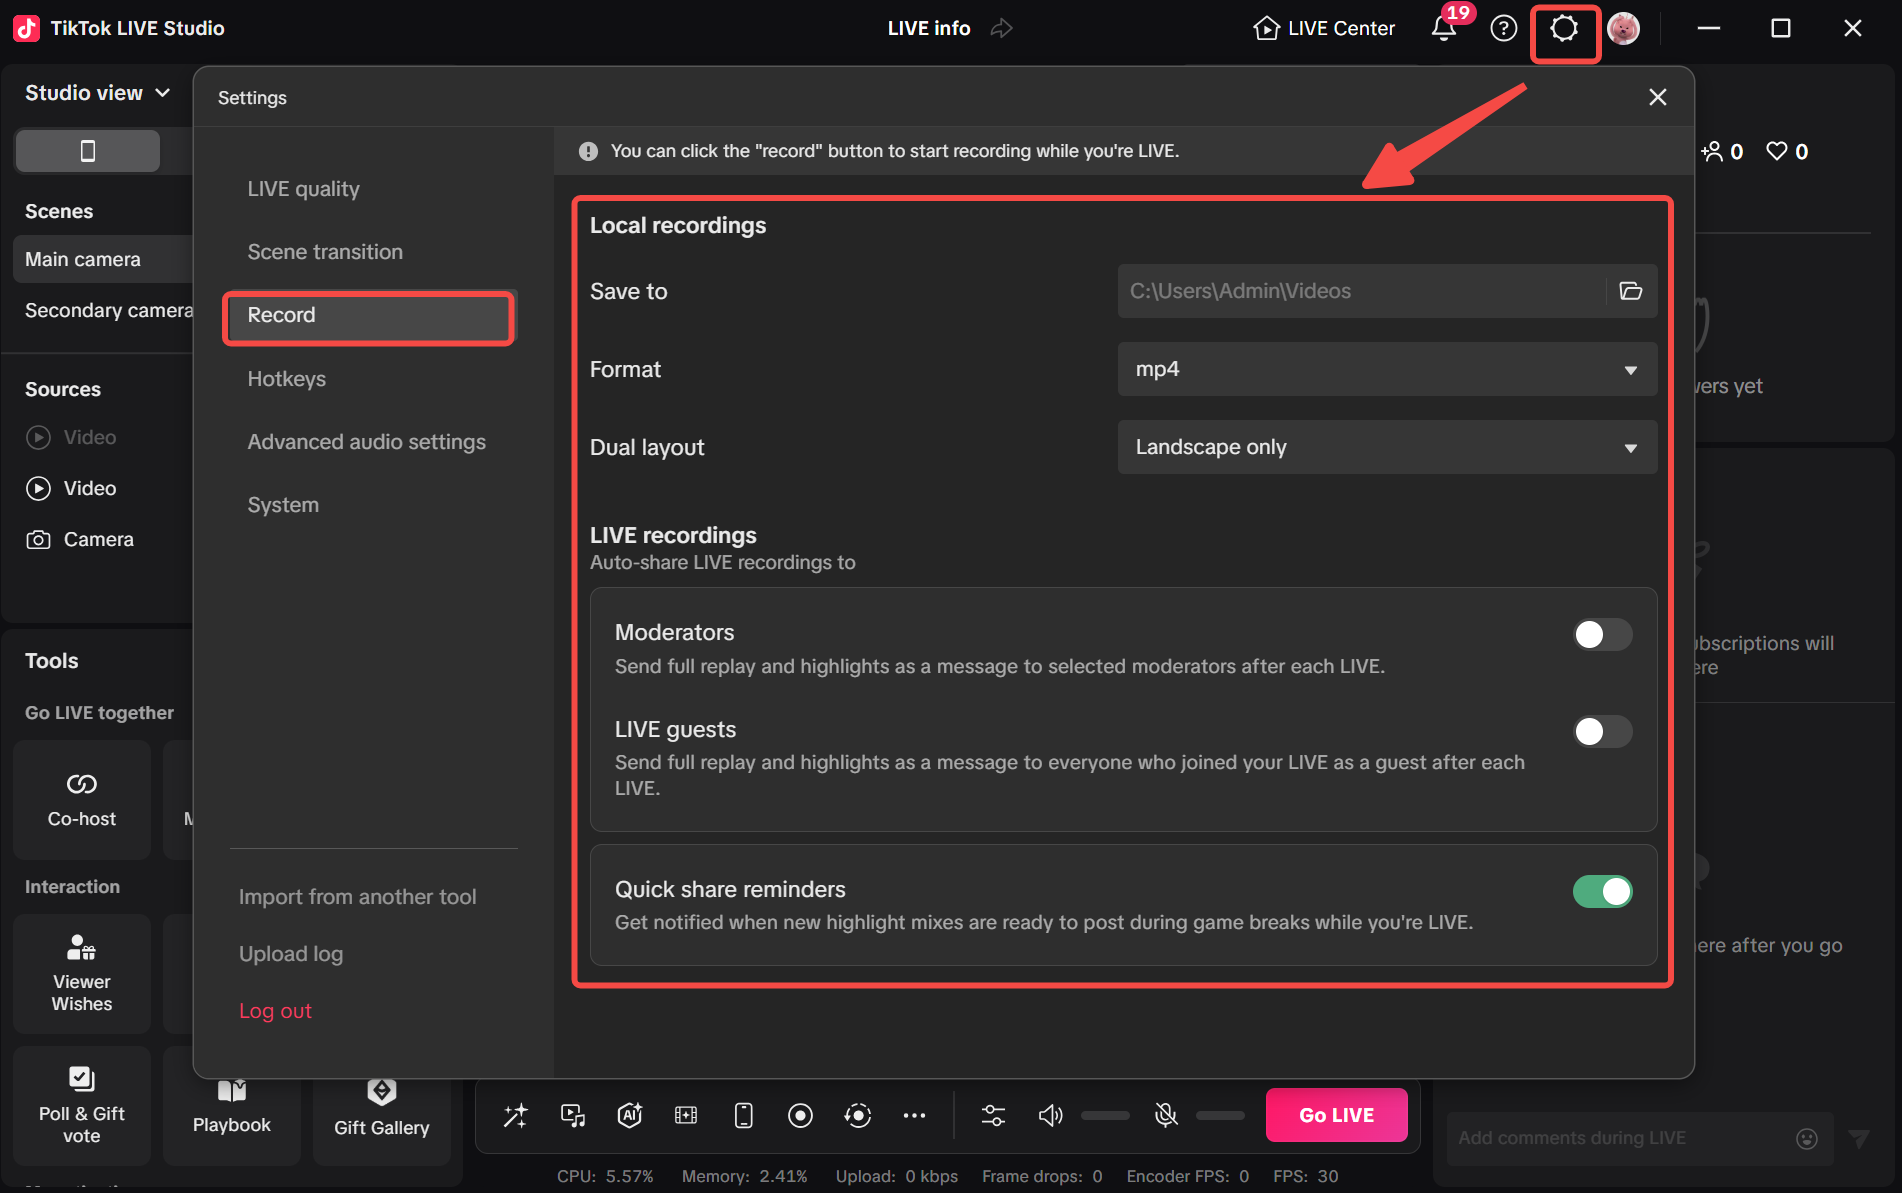
The settings panel is important because it shows recording is not only an on-off button. You can define where files are saved, what format you want, and how the recorded layout should be handled. That is worth checking before the stream, not after you realize the recording is hard to use.
Two useful judgment rules:
- record when the stream includes reusable content, teaching, or a planned segment you may want to clip later
- skip recording only if storage or workflow simplicity matters more than later review
A common beginner mistake is forgetting whether recording is actually running. Another is never checking save location or format until after the stream ends. If you care about clips, verify both the recording state and the recording settings before the most important part of the stream begins.
How LIVE Chat and LIVE Center Help You Monitor the Stream
Chat is not just where messages appear. It is also where you see whether your pacing, topic, and call to action are actually landing with viewers.
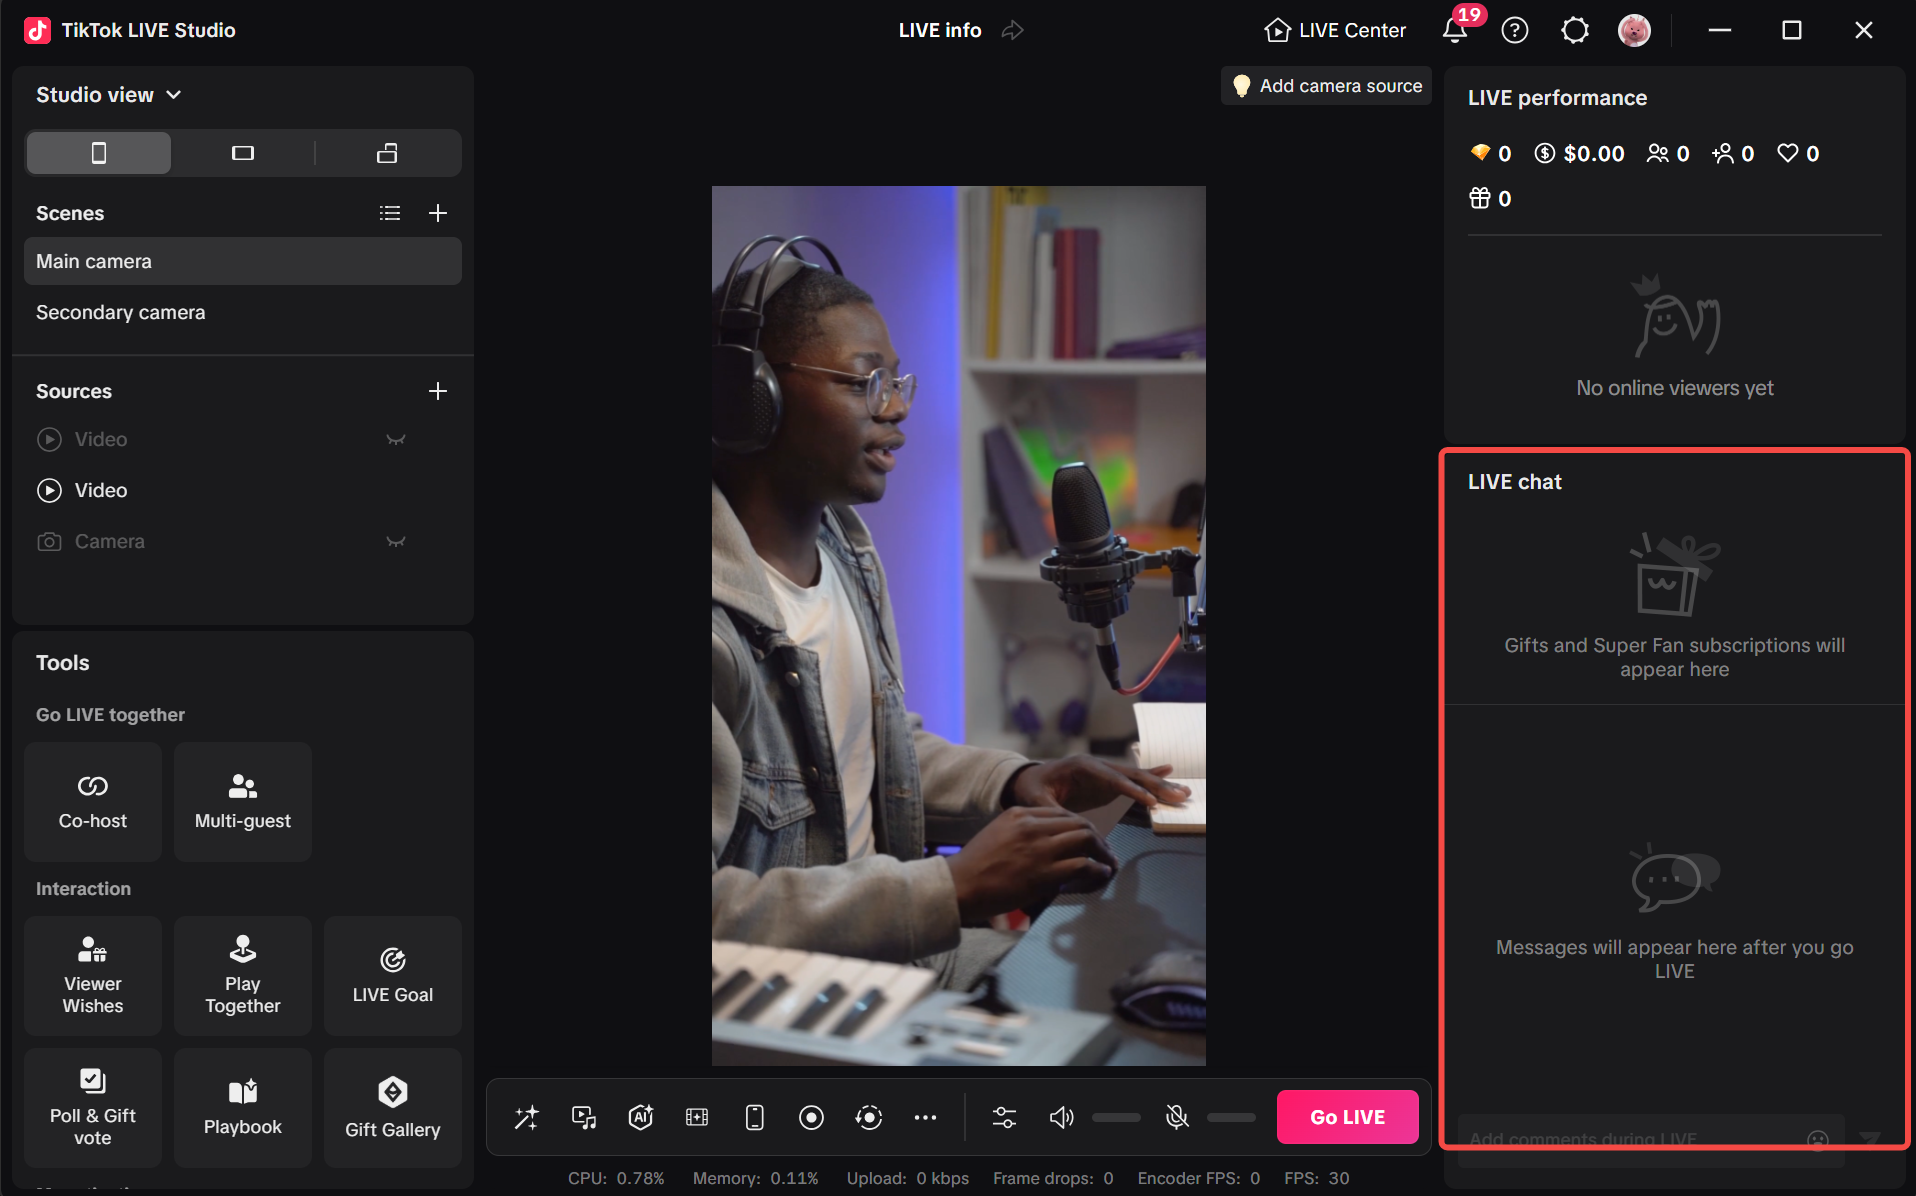
A visible chat panel makes it easier to:
- greet viewers quickly
- notice repeated questions
- spot confusion before it becomes a bigger issue
- coordinate with a moderator or a co-host flow
The panel matters most when you use it as a signal reader rather than a distraction feed. If three viewers ask the same question, that is often a content instruction: slow down, explain again, or switch scenes to show the answer more clearly.
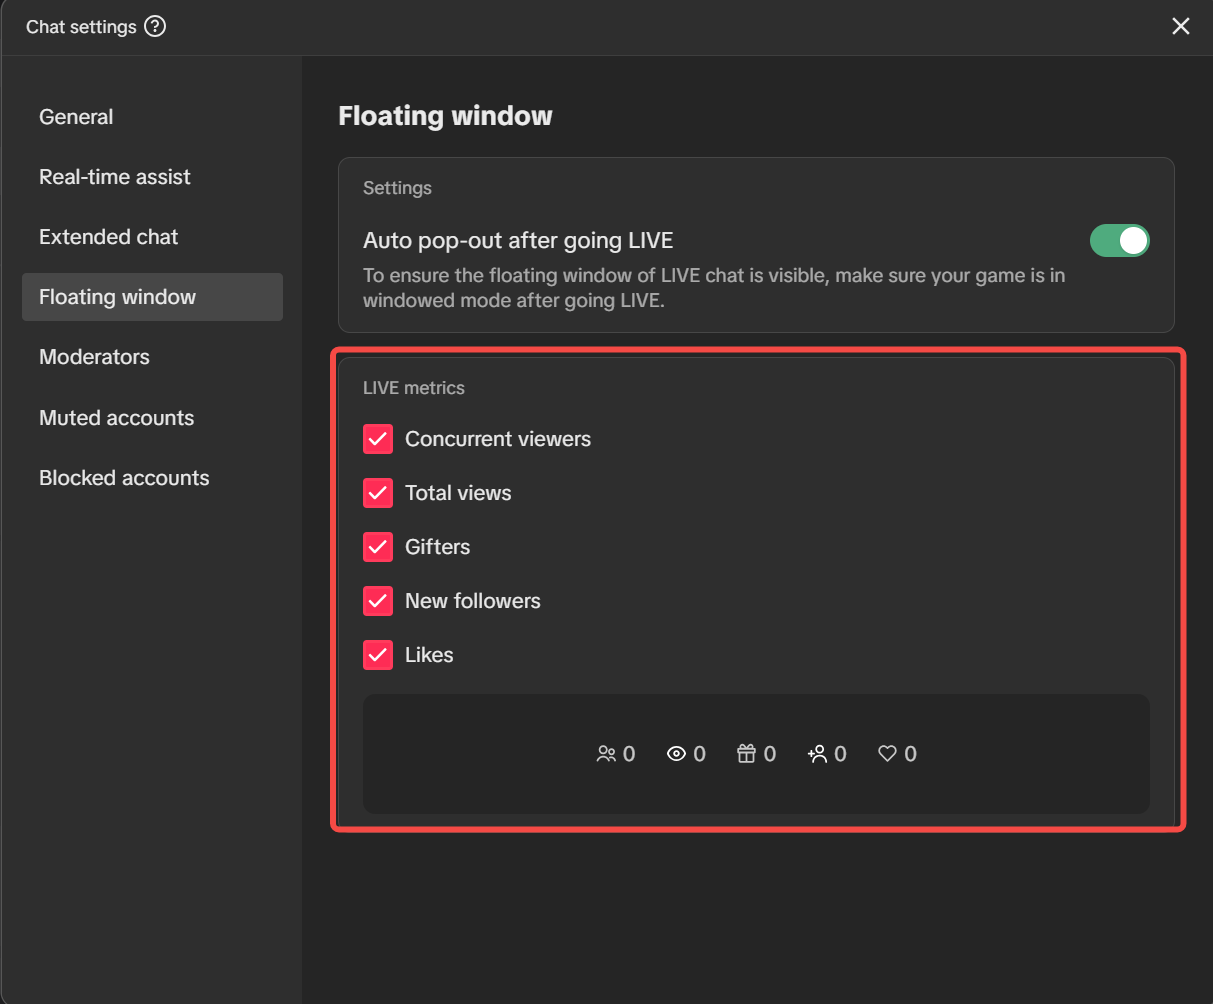
The floating window settings add another useful layer. If your main canvas already feels busy, a pop-out or floating view can make chat and quick metrics easier to monitor without constantly shifting your eyes across the whole interface. It is especially practical when you want to keep joins, likes, gifts, and viewer count visible while still focusing on the content area.
A practical chat workflow looks like this:
- Keep the main chat panel or a floating chat view visible.
- Watch for repeated questions rather than reacting to every single message.
- Use moderators, muted accounts, or blocked-account controls when chat quality starts hurting the stream.
- Return attention to the main content once the immediate issue is handled.
LIVE Center adds a broader performance view that helps you read the stream beyond the current screen.
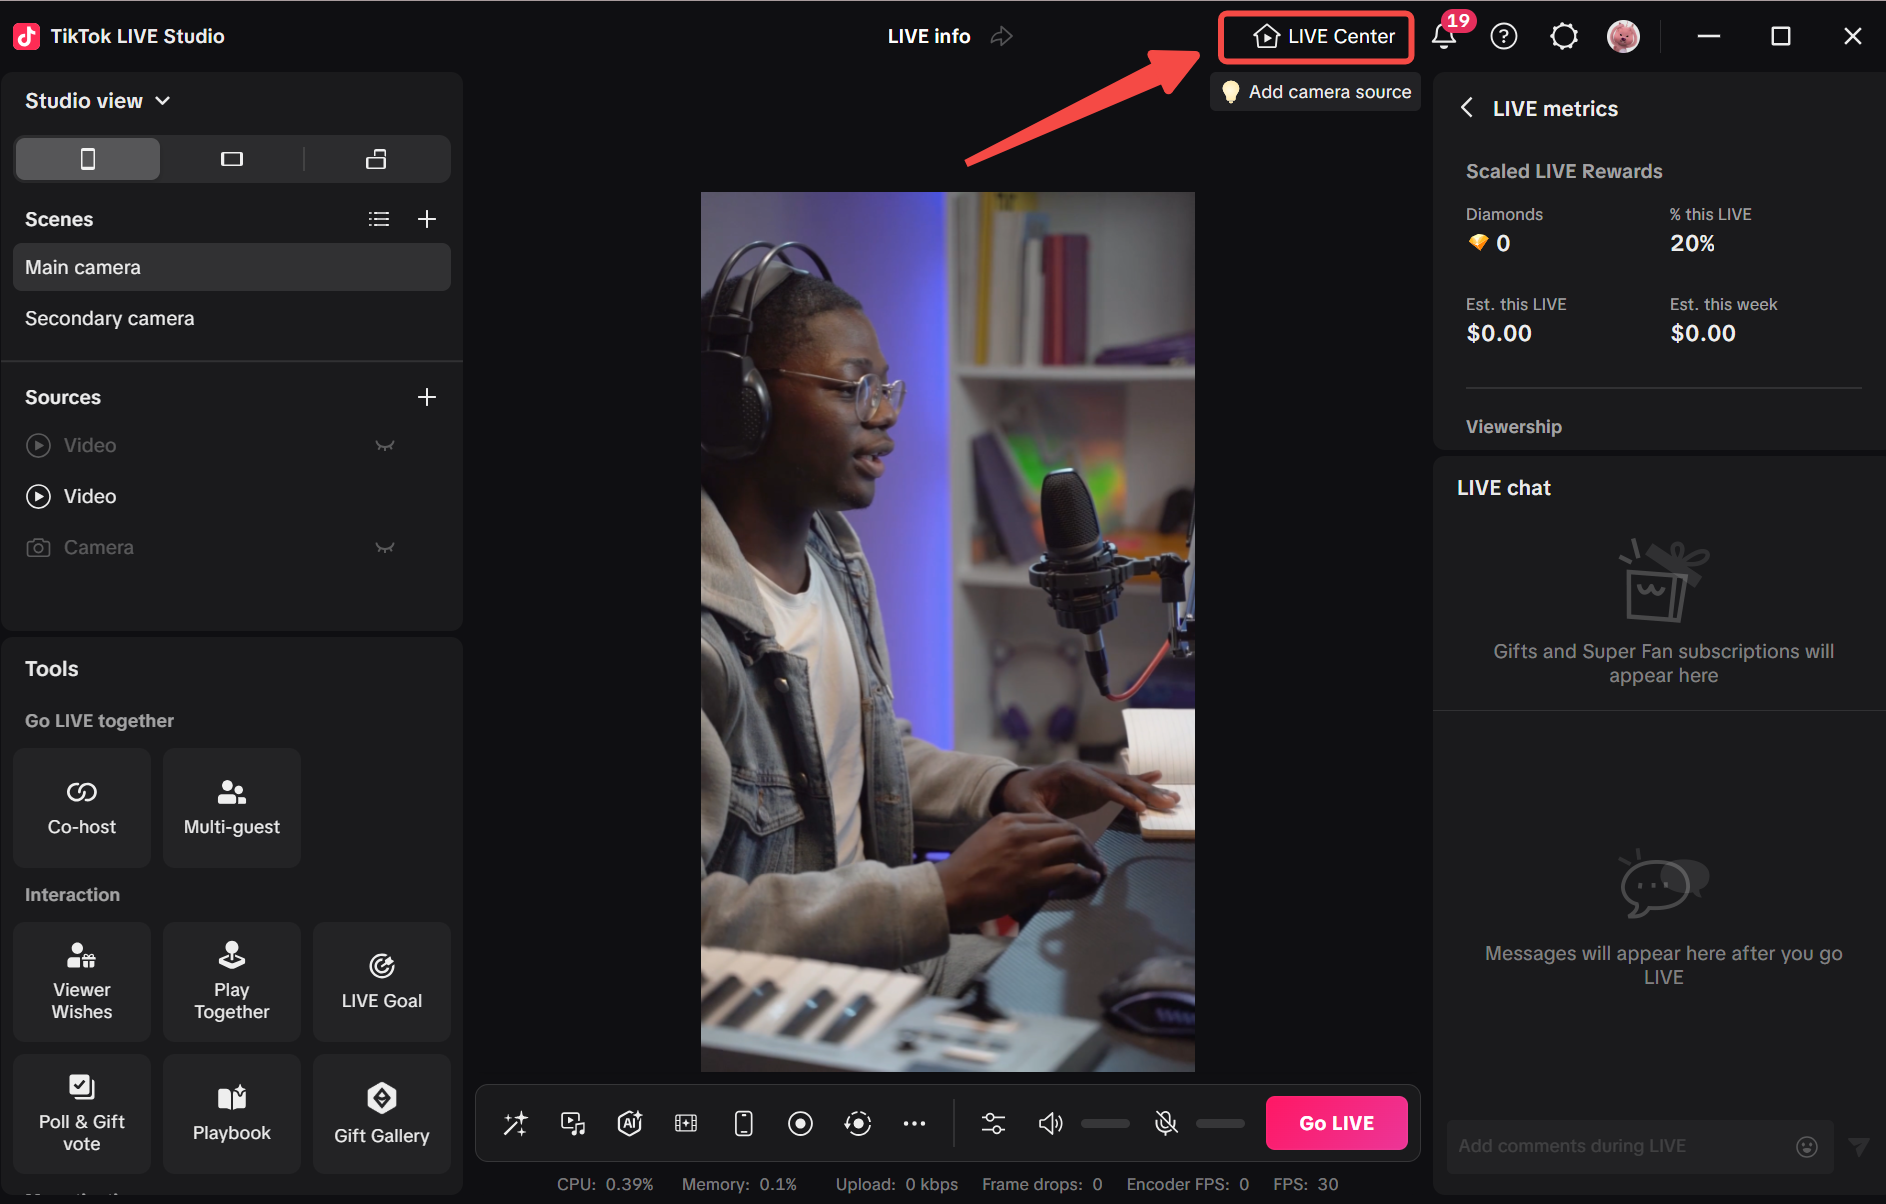
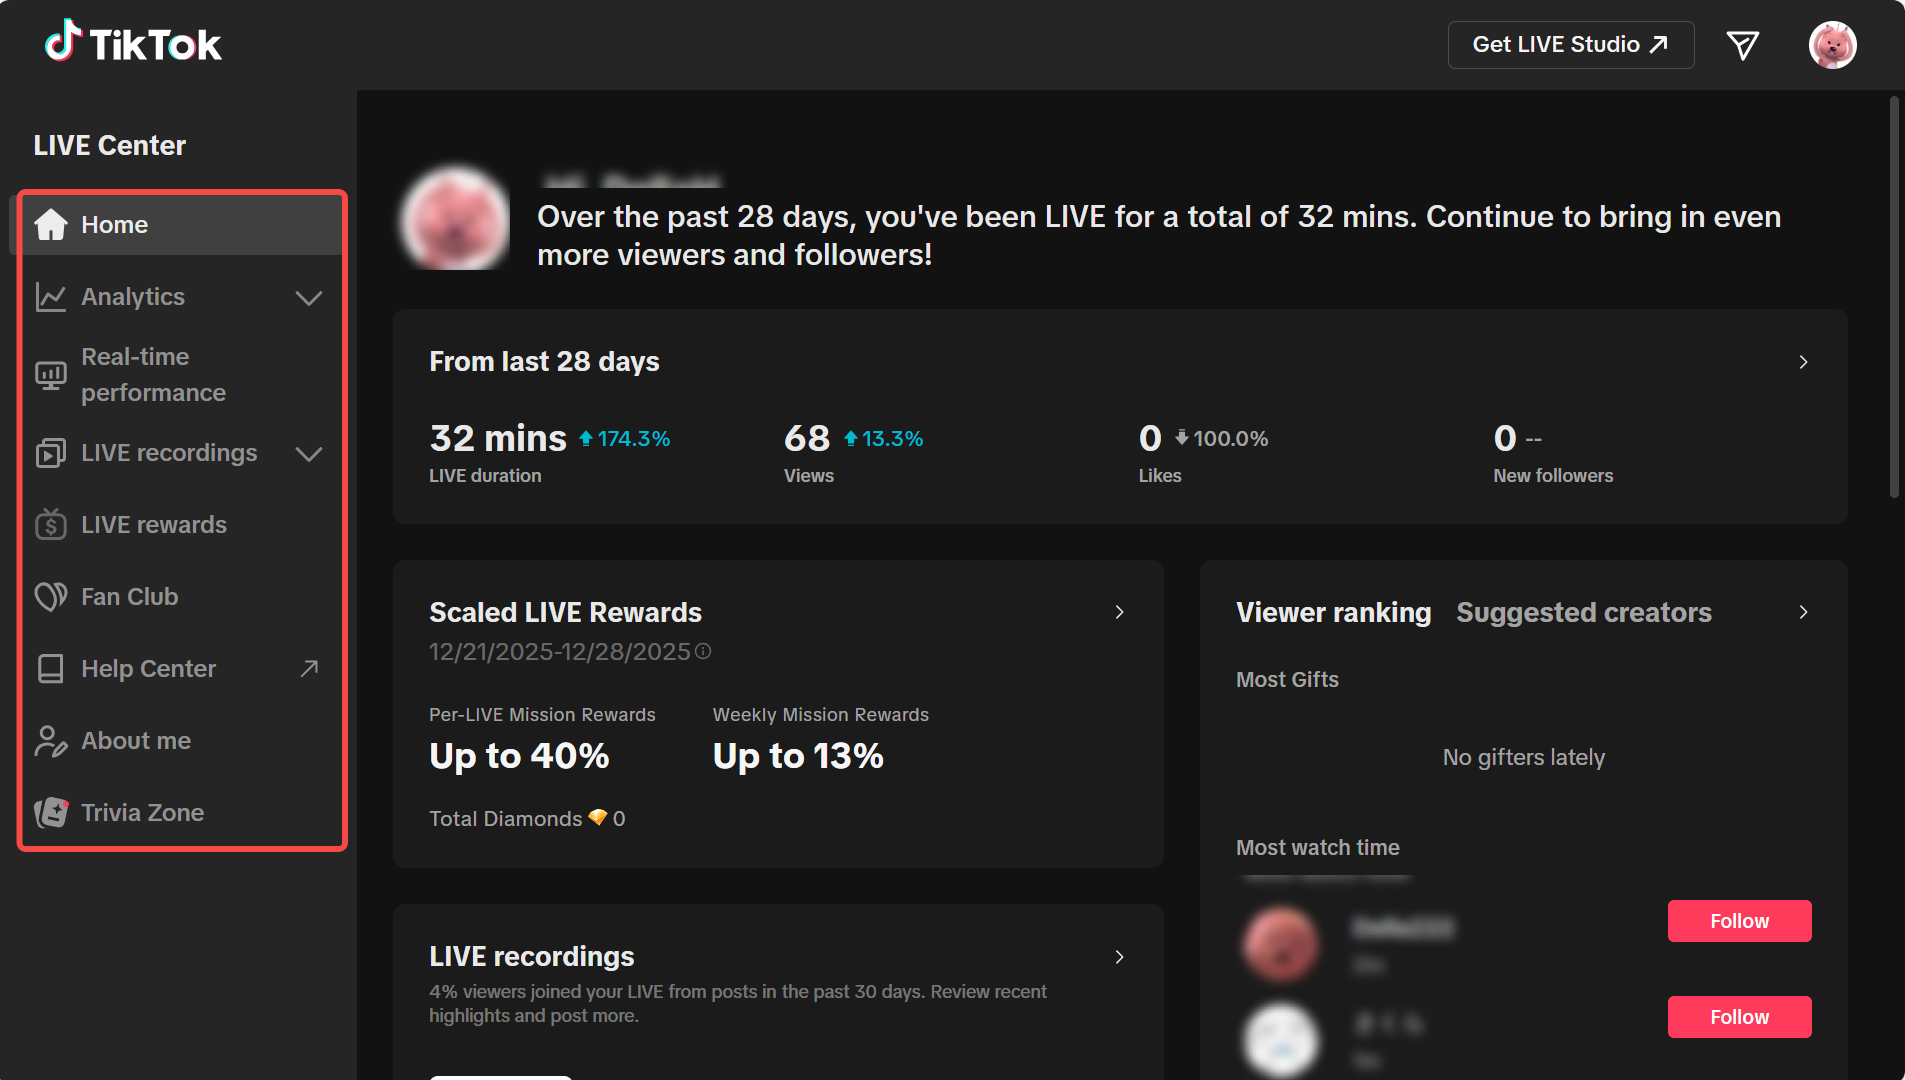
Metrics are most useful when you connect them to what you just did. If viewership or interaction changes after a topic switch, product demo, or call to action, you can start learning what creates momentum. The fuller LIVE Center view is also useful because it frames performance, recordings, rewards, and other post-stream review areas as part of one workflow rather than one isolated metrics box.
A simple beginner rule:
- use chat to understand immediate audience needs
- use LIVE Center to understand broader stream momentum and review patterns over time
One common mistake is staring at metrics without context. Numbers only become useful when you connect them to a moment in the stream.
How to Set Useful Hotkeys
Hotkeys are most effective when you assign them to a small number of actions you need repeatedly.
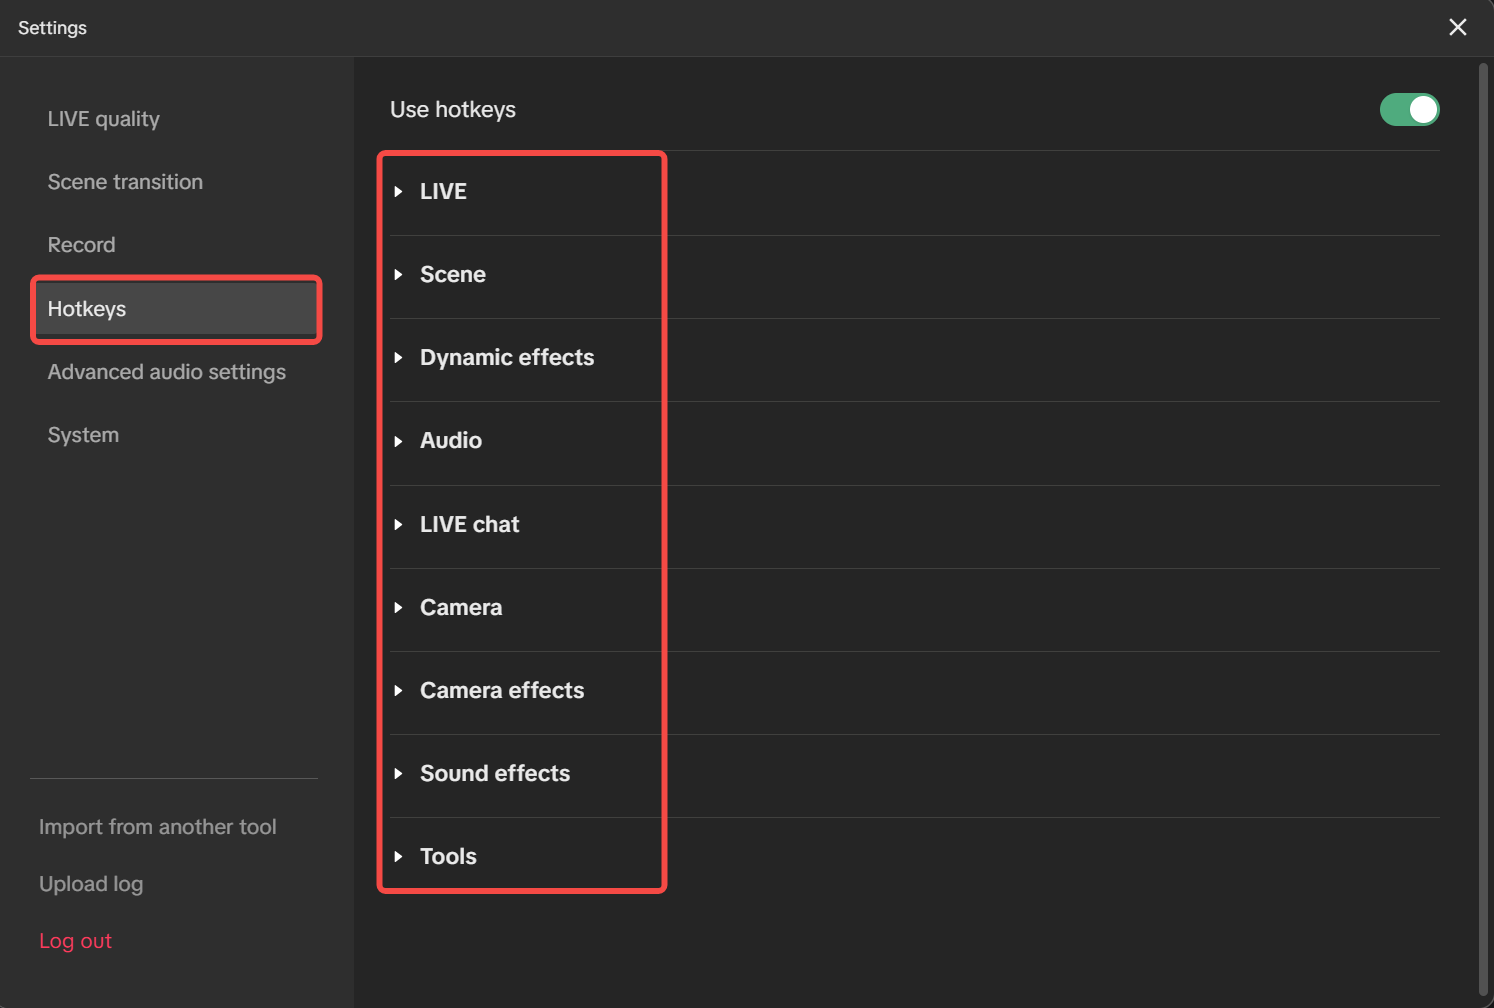
Good beginner hotkey candidates include:
- switch to main scene
- switch to secondary scene
- mute or unmute mic
- show or hide chat if supported in your workflow
- trigger a key tool action you use often
The reason this settings panel is important is not because every option must be used. It is because it shows how LIVE Studio groups operating behavior into categories. That makes it easier to build a short, intentional hotkey set instead of assigning random shortcuts everywhere.
A practical setup process looks like this:
- List the actions you perform most often during a stream.
- Pick only the top three to five actions that truly save time.
- Test them in a short rehearsal.
- Remove any hotkey you keep forgetting or pressing by mistake.
The goal is speed without confusion. If you assign too many hotkeys too early, you are more likely to forget them or hit the wrong one. Start small and add more only after your core actions feel automatic.
A Simple Operating Routine for Beginners
A reliable pre-live and during-live routine can look like this:
- Check mobile preview for layout confidence.
- Confirm recording settings and start recording if you want reusable footage.
- Keep chat or a floating chat view visible enough to respond naturally.
- Watch LIVE Center when you want to read overall momentum or review results later.
- Use hotkeys only for the actions you need most.
This routine matters because it reduces decision fatigue. Instead of improvising every control choice, you already know what your operating pattern looks like.
A few common beginner errors are worth avoiding:
- checking preview too late
- recording only after the key segment has started
- letting chat disappear from your attention for too long
- assigning too many hotkeys at once
- reading metrics without linking them to stream actions
If you correct those mistakes early, your streams immediately feel more controlled.
Summary
Mobile preview, recording, chat, LIVE Center, and hotkeys make TikTok LIVE Studio feel much more manageable. They help you notice issues earlier, react faster, and review the stream more intelligently afterward.
Once these controls feel natural, you are ready to move into the engagement tools that make the stream more interactive for viewers.